
Ever had one of those days when you’re starving, but cooking a complicated meal feels like a battle you just don’t have the energy for? We’ve all been there! That’s why Pita Pockets are a total game-changer. Imagine a meal that’s quick, fresh, and packed with flavor—without all the hassle. First, they’re ridiculously easy to make. Next, they’re healthy, with fresh veggies and protein-packed fillings to keep you energized. Plus, they’re perfect for anyone, whether you’re a busy parent, a student on the go, or just someone who loves good food without the extra work.
But here’s the best part—these little pockets of joy are incredibly versatile! You can fill them with your favorite ingredients, making every bite a delicious surprise. Also, they’re great for meal prep, parties, or even a quick snack. So, why wait? Keep reading to discover how to make the easiest, tastiest Pita Pockets ever!
Table of Contents
What Are Pita Pockets?
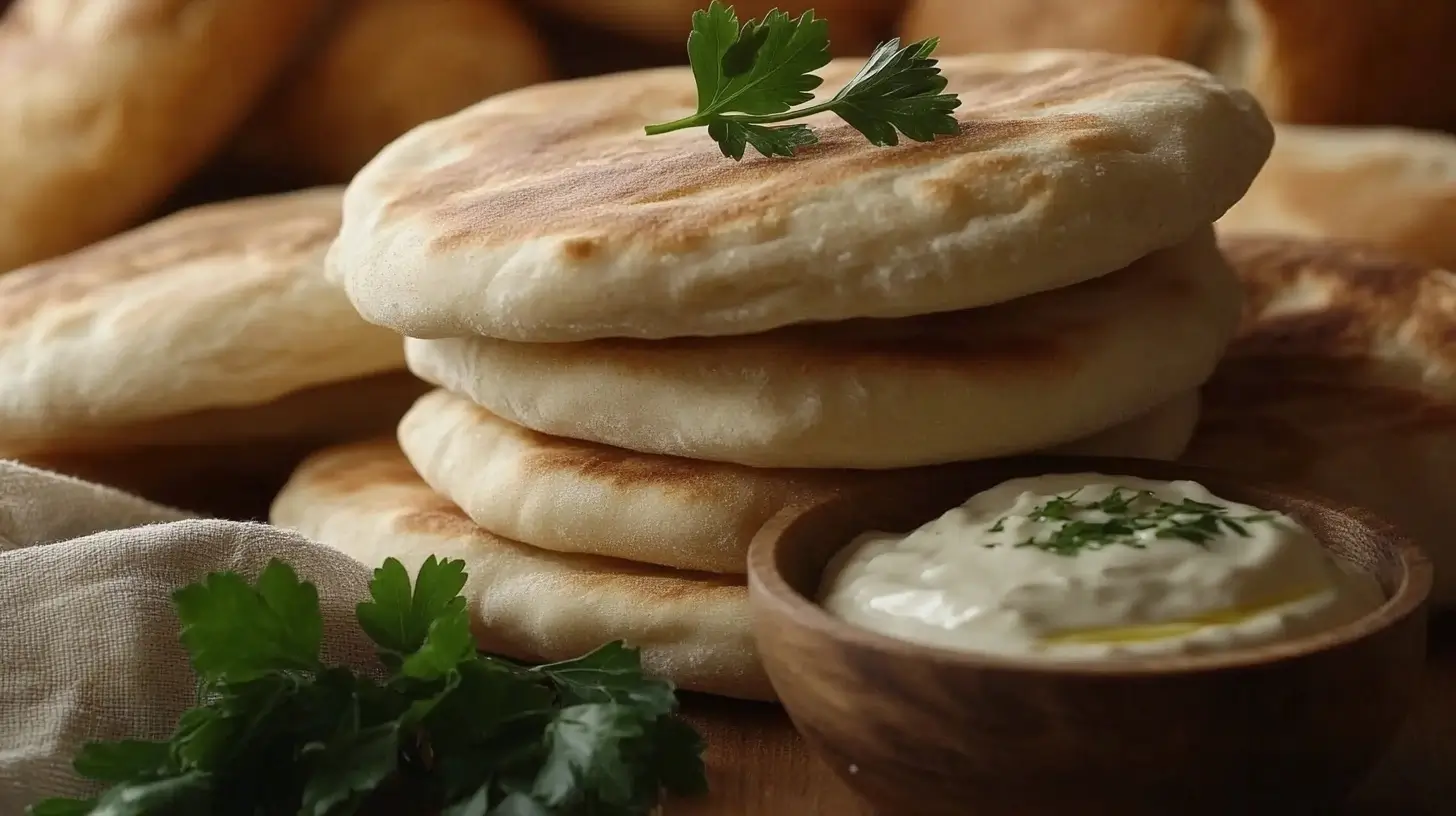
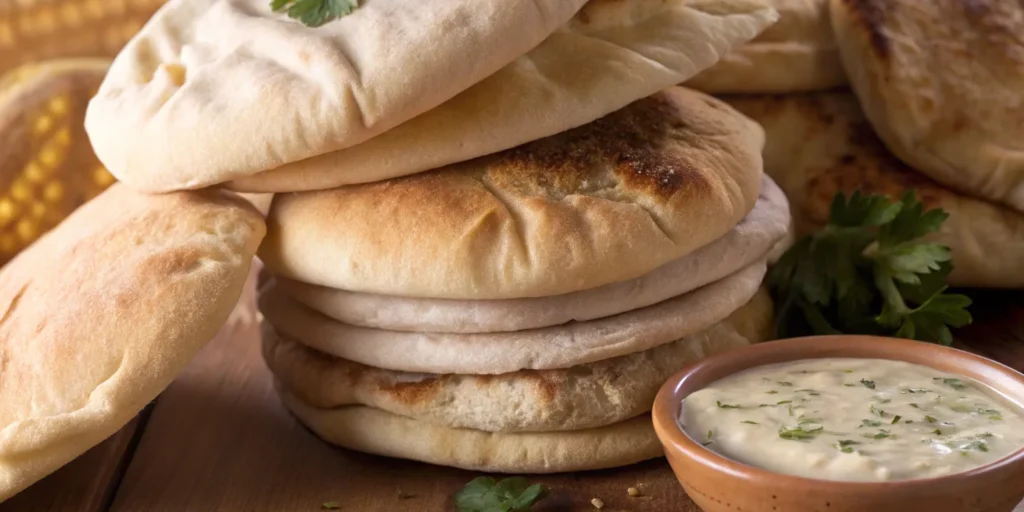
Pita pockets are soft, round flatbreads with an internal cavity that forms naturally during the baking process. This pocket makes them ideal for stuffing with a variety of ingredients, creating an effortless, handheld meal. Originating in the Middle East and Mediterranean regions, pita bread has been a dietary staple for thousands of years. Today, it remains popular worldwide, thanks to its versatility and adaptability to different cuisines.
Why Are Pita Pockets Worth Exploring?
Pita pockets are more than just bread—they are a practical and delicious way to enjoy diverse meals. Here’s why they deserve a spot in your kitchen:
- Convenience: Pita pockets are easy to prepare, fill, and eat, making them a great choice for busy lifestyles.
- Health Benefits: When made with whole wheat, pita pockets offer more fiber and nutrients than traditional white bread.
- Versatility: They can be paired with a range of flavors, from Middle Eastern spices to classic American sandwich fillings.
- Cultural Significance: Pita bread has a rich history and is deeply ingrained in various culinary traditions across the world.
Is There a Difference Between Pita Pockets and Pita Bread?
Yes, while all pita pockets are a type of pita bread, not all pita bread has a pocket. The difference lies in the baking process:
- Pita Pockets: These are baked at high temperatures, causing steam to form inside, which puffs the dough and creates the pocket.
- Regular Pita Bread: Some versions remain flat and do not develop an internal pocket, making them more like a wrap or traditional flatbread.
Understanding this distinction helps in selecting the right type of pita for your culinary needs.
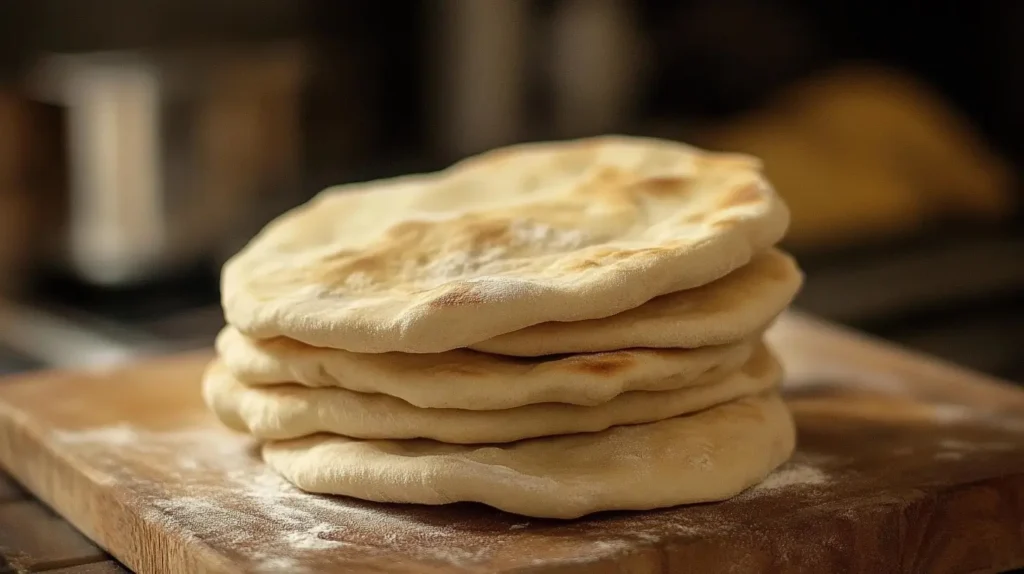
How Are Pita Pockets Made?
Making pita pockets at home is simpler than you might think. It requires just a few basic ingredients and a high-temperature oven to achieve the signature puffed shape.
Ingredients:
| Ingredient | Amount | Notes |
|---|---|---|
| All-purpose flour | 3 cups | Whole wheat can be substituted |
| Warm water | 1 cup | Helps activate the yeast |
| Yeast | 2 1/4 tsp | Active dry yeast preferred |
| Sugar | 1 tsp | Feeds the yeast for rising |
| Salt | 1 tsp | Enhances flavor |
| Olive oil | 1 tbsp | Adds moisture |
Instructions:
- Prepare the Dough: In a mixing bowl, dissolve the yeast and sugar in warm water. Let it sit for 5 minutes until foamy.
- Mix Ingredients: Add the flour, salt, and olive oil to the yeast mixture. Knead for 8-10 minutes until smooth and elastic.
- Let It Rise: Cover and let the dough rise for 1 hour, or until it doubles in size.
- Divide and Roll: Punch down the dough and divide it into equal-sized balls. Roll each ball into a thin disc about ¼ inch thick.
- Bake to Perfection: Preheat the oven to 475°F (245°C). Place the rolled dough on a baking sheet and bake for 3-5 minutes. The pitas should puff up, creating the classic pocket.
- Cool and Serve: Remove from the oven, let them cool slightly, and slice to create the perfect pocket for your favorite fillings.
Can You Cut Pita Bread to Make a Pita Pocket?
Yes! If your pita has an internal pocket, you can cut it to create an opening for fillings. Here’s how:
- Use a Sharp Knife: A serrated knife helps make a clean cut without tearing the bread.
- Slice Gently: Cut either halfway to make a deep pocket or fully in half for smaller, sandwich-like portions.
- Warm Slightly: If the bread is stiff, warming it for a few seconds in the microwave or oven can make it more pliable.
Best Practices for Warming and Softening Pita Bread
Pita pockets are best enjoyed warm and soft. Here are the best methods to achieve this:
- Oven Method: Wrap the pita in aluminum foil and bake at 350°F (175°C) for 10 minutes.
- Stovetop Method: Heat in a dry skillet over medium heat for 30 seconds on each side.
- Microwave Method: Wrap in a damp paper towel and heat for 15-20 seconds to add moisture.
Each method enhances the pita’s flexibility and flavor, making it easier to fill and enjoy.
Are Pita Pockets Healthier Than Regular Bread?
Pita pockets can be a healthier choice than traditional bread, depending on the ingredients used. Here’s why:
- Lower in Calories: A standard pita pocket contains fewer calories than two slices of regular bread.
- Higher in Fiber: Whole wheat pita pockets provide more fiber, aiding digestion and satiety.
- Fewer Additives: Many store-bought breads contain preservatives, while homemade or fresh pita pockets have fewer additives.
Whole Wheat vs. White Pita: Which Is Better?
Choosing between whole wheat and white pita depends on your health goals:
- Whole Wheat Pita: Rich in fiber and nutrients, promotes heart health, and stabilizes blood sugar levels.
- White Pita: Softer texture but lower in fiber and higher in refined carbs.
For a healthier option, opt for whole wheat pita whenever possible.
How to Fill a Pita Pocket: Techniques and Tips
Filling a pita pocket properly prevents mess and enhances the eating experience. Follow these techniques:
- Layer for Stability: Start with a spread (hummus, yogurt, or tahini) to create a moisture barrier.
- Add Proteins First: Place proteins like grilled chicken, falafel, or beef at the base for structure.
- Top with Vegetables: Use lettuce, tomatoes, cucumbers, and onions to add crunch and flavor.
- Avoid Overfilling: Too much filling can cause the pita to tear.
By layering ingredients strategically, you can enjoy a balanced, delicious bite every time.
Popular Fillings from Around the World
Pita pockets can be adapted to various cuisines. Here are some popular global fillings:
- Middle Eastern: Falafel, tahini, pickled turnips, and fresh herbs.
- Mediterranean: Grilled chicken, feta, olives, and tzatziki.
- American: Sliced turkey, avocado, lettuce, and ranch dressing.
- Indian: Spiced chickpeas, yogurt sauce, and shredded cabbage.
Each region brings unique flavors, making pita pockets a versatile choice for any meal.
Common Mistakes to Avoid with Pita Pockets
Pita pockets are easy to prepare, but small mistakes can affect their texture, structure, and taste. Avoid these pitfalls to ensure the best results:
Preventing Pita from Tearing
One of the biggest challenges when working with pita pockets is avoiding tears. To keep the bread intact:
- Choose the Right Thickness: If the pita is too thin, it is more likely to break. Aim for a thickness of about ¼ inch.
- Handle with Care: Cut the pocket gently using a sharp knife. Avoid using too much force when opening it.
- Warm Before Cutting: Slightly warming the pita in a microwave or oven makes it more pliable and easier to open.
Avoiding Soggy Fillings
A soggy pita pocket can ruin the eating experience. To prevent this:
- Layer Ingredients Strategically: Start with a moisture-resistant base like hummus or a yogurt-based spread to create a barrier.
- Drain Ingredients Properly: Avoid adding watery vegetables like cucumbers or tomatoes without draining them first.
- Use Dry Fillings First: Place proteins like grilled chicken, falafel, or tofu at the bottom, followed by vegetables and sauces.
What to Serve with Pita Pockets
- Southwest Chicken Salad – A fresh and zesty salad that pairs perfectly with pita pockets.
- Alfredo Spaghetti – Creamy and rich pasta that complements the flavors of stuffed pita pockets.
- Wonton Egg Drop Soup – A warm and comforting soup to balance your pita pocket meal.
Frequently Asked Questions (FAQs)
The following section answers the most commonly asked questions about pita pockets, addressing preparation techniques, nutritional value, and storage tips.
Is There a Difference Between Pita Pockets and Pita Bread?
Yes! While both are pita bread, the key difference lies in the structure:
Pita pockets have an internal cavity that forms when baked at high temperatures.
Traditional pita bread can be flat without forming a pocket, making it more like a wrap or traditional flatbread.
Can You Cut Pita Bread to Make a Pita Pocket?
Yes! You can create a pocket by carefully slicing along the edge with a sharp knife. However, only pita bread that has puffed up during baking will contain an internal cavity.
Are Pita Pockets Healthier Than Bread?
Pita pockets can be healthier than regular sliced bread depending on the ingredients:
Lower in Calories: One pita contains fewer calories than two slices of sandwich bread.
Higher in Fiber: Whole wheat pita offers more fiber than refined white bread.
Less Processed Ingredients: Homemade or freshly baked pita contains fewer preservatives than store-bought sandwich bread.
How to Fill a Pitta Pocket?
To fill a pita pocket effectively:
Cut and Warm It: Slice the top or cut the pita in half. Warm slightly to soften.
Add a Base Spread: Use hummus, tzatziki, or a yogurt sauce to prevent sogginess.
Layer the Ingredients: Start with proteins, followed by vegetables and sauces.
Do Not Overfill: Too many ingredients can cause the pita to break.
What Are Some Gluten-Free Alternatives to Pita Bread?
If you’re looking for gluten-free options, consider:
Corn Tortillas: Naturally gluten-free and flexible for fillings.
Lettuce Wraps: A low-carb alternative.
Gluten-Free Pita Bread: Available in many specialty stores.
How to Store Pita Bread to Maintain Freshness?
To keep pita pockets fresh:
Short-Term Storage: Store in an airtight bag at room temperature for up to 2 days.
Refrigeration: Keep in the fridge for up to a week.
Freezing: Wrap individual pitas in plastic wrap and freeze for up to 3 months.
Conclusion
Pita pockets are a versatile and nutritious addition to any meal. Whether making them from scratch or purchasing them pre-made, understanding how to prepare, fill, and store them properly ensures an enjoyable eating experience. By experimenting with different fillings and techniques, you can customize your pita pockets to suit any dietary preference. Try making your own today and discover endless delicious possibilities!
Print
Pita Pockets
- Total Time: 25-40 min
- Yield: 4-6 stuffed pita pockets
Description
Need a quick, healthy, and flavorful meal that doesn’t require hours in the kitchen? Pita Pockets are your answer! These handheld delights are perfect for a busy lifestyle, offering endless filling possibilities—from protein-packed meats to fresh, crunchy veggies. Whether you need a fast lunch, a grab-and-go snack, or a light dinner, these pita pockets are satisfying, nutritious, and ridiculously easy to make.
Ingredients
For the Pita Bread (Optional – Homemade Version)
- 3 cups all-purpose flour (or whole wheat flour)
- 1 cup warm water
- 2 ¼ teaspoons (1 packet) active dry yeast
- 1 teaspoon sugar
- 1 teaspoon salt
- 1 tablespoon olive oil
For the Filling (Customizable – Choose Your Favorite!)
Protein Options:
- 1 cup grilled chicken (cubed or sliced)
- 1 cup falafel (for a vegetarian option)
- 1 cup shredded beef or lamb
- 1 cup chickpeas (roasted with spices)
Vegetables & Toppings:
- 1 cup lettuce, shredded
- ½ cup cucumber, diced
- ½ cup tomatoes, diced
- ¼ cup red onion, finely chopped
- ¼ cup fresh parsley or cilantro, chopped
Sauce Options:
- ½ cup hummus
- ½ cup tzatziki sauce
- ½ cup yogurt mixed with lemon juice and garlic
- ¼ cup tahini sauce
Extras (Optional):
- ½ cup crumbled feta cheese
- 1 avocado, sliced
- 1 teaspoon sumac or paprika (for garnish)
Instructions
Making the Pita Bread (If Using Homemade)
-
Activate the Yeast:
- In a bowl, mix warm water, sugar, and yeast. Let sit for 5-10 minutes until it becomes foamy.
-
Prepare the Dough:
- In a large mixing bowl, combine flour, salt, and olive oil. Add the yeast mixture and knead for about 8-10 minutes until smooth.
-
Let It Rise:
- Cover the dough and let it rest for 1 hour, or until doubled in size.
-
Shape the Pitas:
- Divide the dough into small balls and roll them into ¼-inch thick circles.
-
Bake the Pita Bread:
- Preheat the oven to 475°F (245°C) and bake the pitas for 3-5 minutes until they puff up. Let cool before slicing.
Assembling the Pita Pockets
-
Warm the Pitas:
- If using store-bought pitas, warm them in the oven or on a stovetop for 30 seconds per side to make them soft and flexible.
-
Cut and Open the Pockets:
- Use a sharp knife to carefully slice the top off each pita or cut in half to create two smaller pockets.
-
Spread the Base Sauce:
- Add hummus, tzatziki, or yogurt sauce inside the pita to enhance flavor and prevent sogginess.
-
Layer the Fillings:
- Start with your protein (chicken, falafel, beef, or chickpeas), followed by fresh vegetables like lettuce, cucumber, and tomatoes.
-
Add Toppings & Garnishes:
- Sprinkle feta cheese, avocado slices, and fresh parsley or cilantro.
-
Finish with Extra Sauce:
- Drizzle more sauce on top and season with sumac or paprika for extra flavor.
-
Serve & Enjoy!
- Serve immediately with a side of fresh salad, fries, or soup.
Notes
-
Make-Ahead Option:
- Prepped fillings can be stored in the fridge for up to 3 days. Just assemble fresh when ready to eat.
-
Vegan Version:
- Replace meat with falafel or roasted chickpeas, and use dairy-free tzatziki or hummus as your sauce.
-
Spice It Up:
- Add a dash of hot sauce or sliced jalapeños for an extra kick!
-
Storage Tips:
- Store pita pockets in an airtight container and warm before serving for the best texture.
- Prep Time: 15 min (30 min if making homemade pita)
- Cook Time: 10 min
- Category: lunch
- Cuisine: Mediterranean / Middle Eastern
Nutrition
- Serving Size: Serves 4 people
- Calories: 400
- Sodium: 600mg
- Fat: 12g
- Carbohydrates: 50g
- Fiber: 6g
- Protein: 25g