
Have you ever stood before the dessert table at a school function, eyeing that thick, fudgy square that takes you straight back to childhood? Yes, I’m talking about the classic lunch lady brownies that everyone adored. These treats are not only a nostalgic journey to the past but also surprisingly easy to whip up, making them a perfect project for any day of the week.
First, let’s dive into what makes these brownies so irresistibly good. Not only are they rich and full of chocolatey goodness, but they’re also crafted from ingredients you likely have in your pantry right now. Moreover, they come together in a snap—no fancy techniques required. It’s like a fun little challenge, isn’t it? You’re going to love seeing how simple steps bring out such delightful flavors. So, why not give it a try? Keep reading to discover how you can recreate this beloved treat in your own kitchen, ensuring a sweet trip down memory lane with every bite.
Exploring the History of Lunch Lady Brownies
Origins of the Classic School Cafeteria Treat
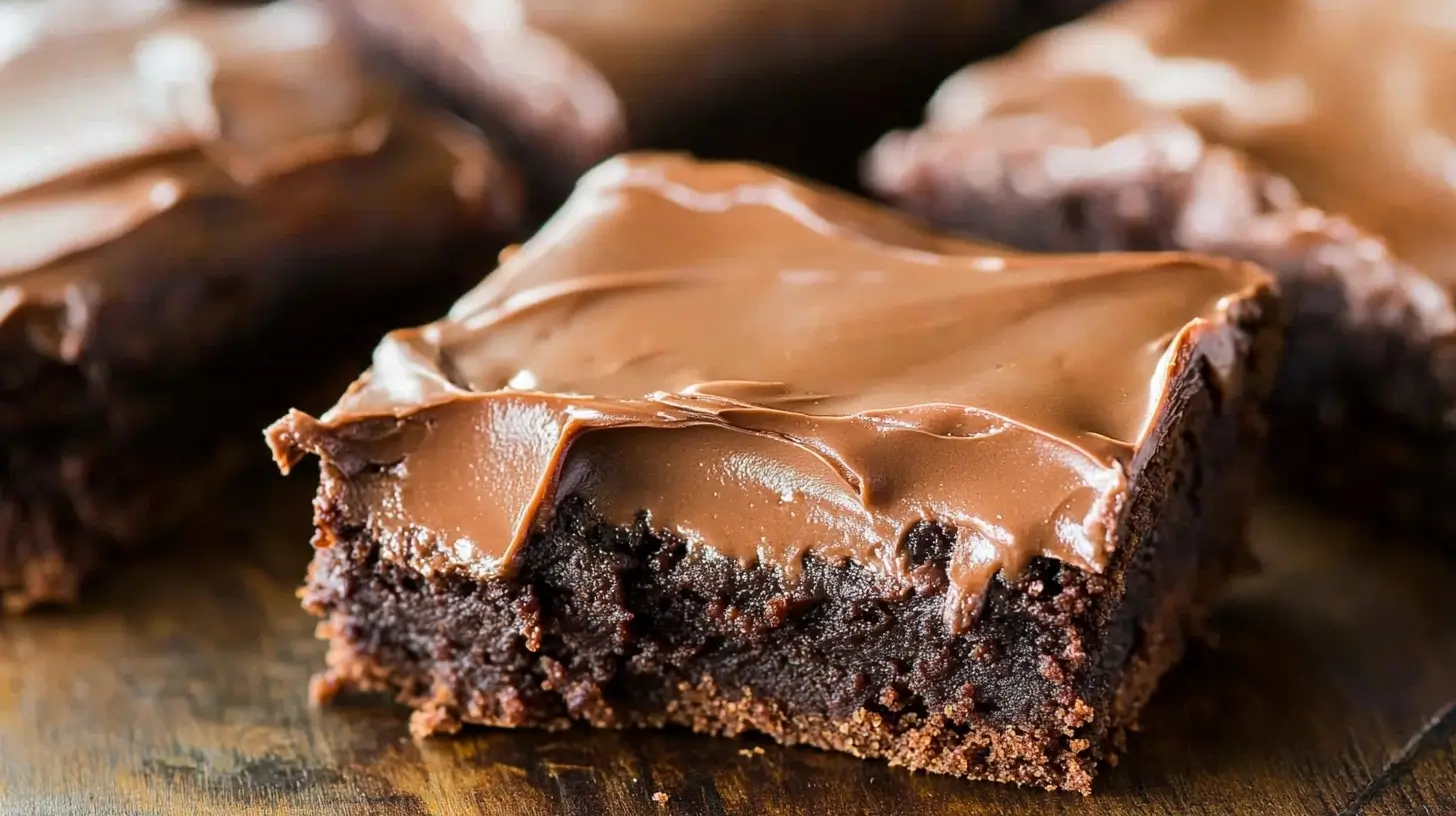
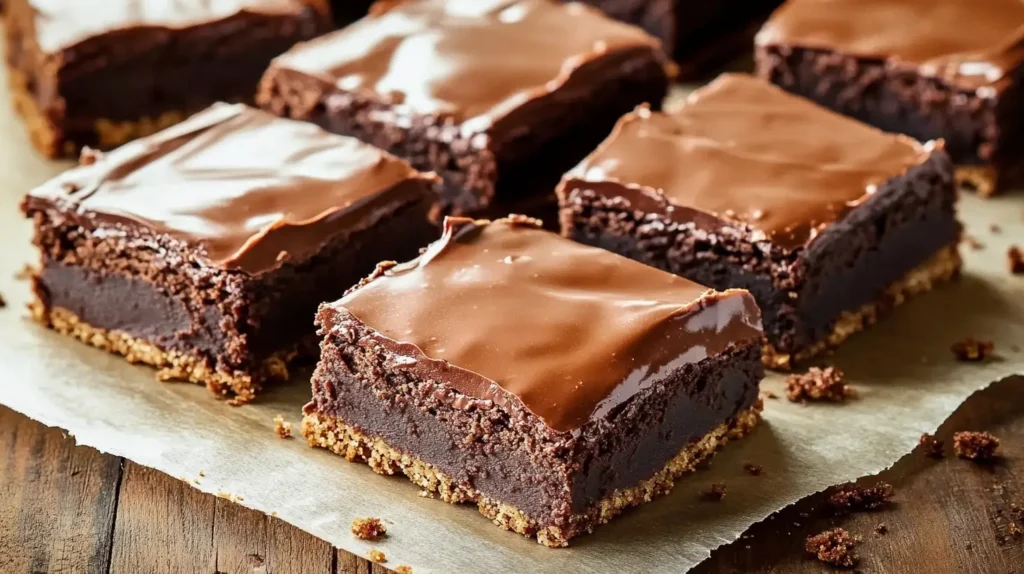
Imagine walking down the crowded hallways of a bustling school, where the aroma of freshly baked brownies fills the air, drawing students like bees to honey. These aren’t just any brownies—they are the iconic lunch lady brownies, a staple that brings smiles and sweet satisfaction. Known for their thick, fudgy texture and irresistible chocolate glaze, these treats have been a favorite for generations. Simple and delightful, each bite takes you on a nostalgic trip to those carefree school days, proving that some recipes are timeless.
How These Brownies Became a Staple in Schools Across America
Lunch lady brownies first made their appearance in school cafeterias in the mid-20th century, quickly becoming a beloved treat. Here’s how they spread across America:
| Year | Event |
|---|---|
| 1950s | Introduction in a small midwestern school district |
| 1970s | Popularity peaks as they become a menu staple |
| 1990s | Featured in school-themed cookbooks |
Choosing the Right Ingredients for Authentic Taste
Best Types of Chocolate and Cocoa for Richness
To capture the authentic taste of lunch lady brownies, selecting the right chocolate is crucial. Opt for a rich, high-quality cocoa powder for that deep, chocolatey flavor foundational to the brownies’ allure. Mixing in a handful of chocolate chips can add delightful pockets of melted chocolate, enhancing the texture and taste. This combination ensures each square is decadently moist and rich, making it hard to stop at just one.
Importance of Ingredient Quality in Brownie Recipes
The quality of ingredients directly affects the flavor and texture of your brownies, making it essential to choose wisely:
- Butter: Unsalted butter provides richness and depth.
- Sugar: A blend of white and brown sugar offers sweetness with a hint of molasses.
- Eggs: Large, fresh eggs contribute to the brownies’ structure and moistness.
Alternative Baking Methods for Perfect Brownies
Baking in Conventional vs. Convection Ovens
Understanding your oven can be the secret to perfect brownies. A conventional oven provides gentle baking with radiant heat, ideal for those tender, gooey centers. In contrast, a convection oven circulates hot air, reducing cooking time and helping the surface bake uniformly. Adjust the temperature accordingly: reduce it by 25 degrees Fahrenheit when using convection to avoid overbaking the edges before the center sets.
Adjustments for High Altitude Baking
Baking at high altitudes can be tricky due to lower air pressure:
- Increase flour: Add an extra tablespoon per cup to maintain structure.
- Decrease sugar: Reduce by a tablespoon per cup to prevent over-spreading.
- Adjust leavening: Reduce baking powder or soda by a quarter teaspoon to prevent them from rising too quickly.
Creative Twists on the Traditional Lunch Lady Brownie Recipe
Incorporating Nut-Free Additives for Allergy-Friendly Schools
Nut allergies are a serious concern in many schools, making it essential to adapt recipes for safety. Try adding sunflower seeds or pumpkin seeds for a nutty texture without the allergens. These substitutes provide the crunch and flavor that nuts typically offer, making your brownies inclusive and just as tasty.
Vegan Alternatives to Cater to Dietary Restrictions
For a vegan twist on the classic brownie:
- Eggs: Use flaxseed meal mixed with water as a binding agent.
- Butter: Opt for coconut oil or vegan butter.
- Milk: Almond or soy milk works beautifully in the glaze.
Storing and Preserving Brownies for Optimal Freshness
Best Practices for Keeping Brownies Moist and Delicious
To keep lunch lady brownies moist and delicious, store them in an airtight container at room temperature. For added freshness, place a slice of bread in the container; the brownies will absorb moisture from the bread, keeping them soft and chewy for days.
Long-Term Storage Solutions Without Losing Flavor
For long-term storage:
- Cool completely: Ensure brownies are at room temperature to prevent condensation.
- Wrap tightly: Use cling film to wrap individual pieces tightly.
- Freeze: Place wrapped brownies in a freezer bag and freeze for up to 3 months.
Thawing them at room temperature or briefly in the microwave can bring back their fresh-from-the-oven taste, making them a convenient treat to have on hand for any sweet craving.
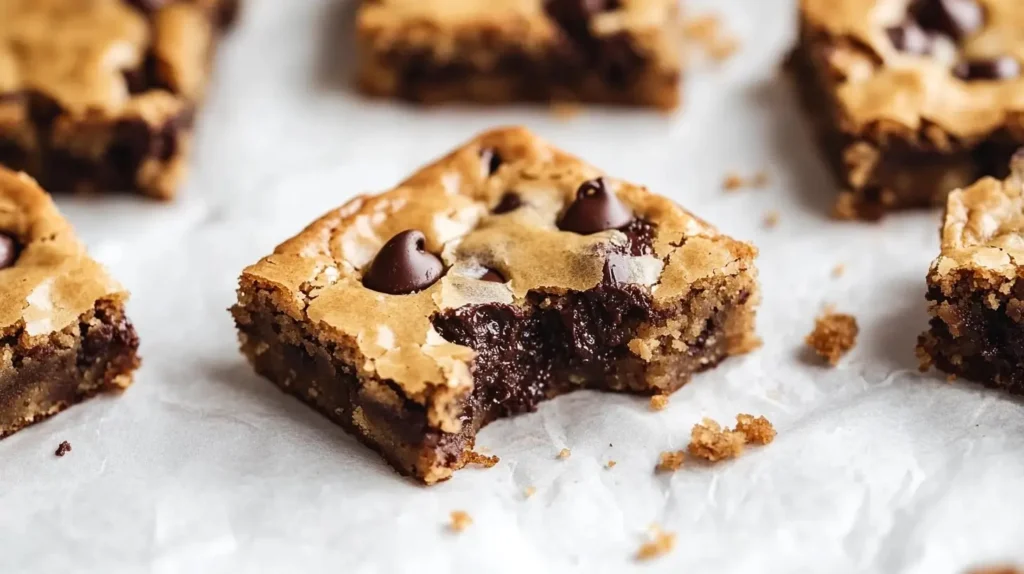
Ready to stir things up? Let’s bake some Schoolyard Chocolate Chip Blondies next—a sweet, simple twist on a classic!
Ingredients
First up, let’s talk butter. Melt it down to infuse your blondies with those irresistible toffee undertones that make each bite a decadent delight. Next, scoop in the brown sugar—make sure it’s the light, golden kind and packed tightly to get the sweetness just right. Then, crack in an egg plus an extra yolk; this is your secret weapon for achieving that perfect chewy texture. Also, a splash of pure vanilla extract will add that aromatic flair, turning simple into sublime.
Now, sift in the all-purpose flour, your foundational element, ensuring your blondies have the perfect structure. In addition, a pinch of baking soda makes all the difference, giving a slight lift without venturing into cake territory. Don’t forget the salt—a tiny sprinkle enhances all the flavors, tying them beautifully together. Finally, stir in those luscious semi-sweet chocolate chips, with an option to switch up to milk or dark chocolate if that’s your jam. Guittard and Ghirardelli chips come highly recommended for melting beautifully into each square.
Step-by-Step Instructions
Begin by preheating your oven to 350 degrees Fahrenheit, ensuring it’s hot and ready for baking. First, blend your melted butter and brown sugar in a large bowl until they form a smooth, irresistible mix. Then, whisk in your eggs and vanilla, combining them until the mixture is glossy and inviting. Next, gently fold in your dry ingredients—flour, baking soda, and salt—taking care not to overmix to keep the texture light and chewy.
Spread the batter evenly into a greased baking pan, smoothing the top with a spatula. Sprinkle your chocolate chips over the top, distributing them for maximum chocolate coverage. Then, slide the pan into the oven and bake for about 20-25 minutes. You’ll know they’re done when the edges are lightly browned and the center sets but remains slightly soft. Let them cool in the pan, then slice into squares and serve up a batch of nostalgia with a chocolatey twist!
Serving
These blondies are perfect just as they are, warm and gooey straight from the pan. They serve well for about 8 people, making them ideal for a small gathering or a family treat. If you’re feeling adventurous, try serving them with a scoop of vanilla ice cream or a drizzle of caramel sauce for added decadence. For a fun twist, sprinkle a little sea salt on top before serving to enhance the chocolate flavor.
What to Serve with Chocolate Chip Blondies
- Chicken Stuffed Crescent Rolls – A savory twist to balance out the sweetness.
- Chocolate Pound Cake Recipe – Indulge in more chocolatey goodness alongside your blondies.
- Strawberry Poke Cake Recipe – A fruity cake to complement the rich flavors of the blondies.
- Bread Pudding with Vanilla Sauce – A delicious dessert option that brings warmth and sweetness to the table.
Tips and Hacks
For an extra flavorful twist, brown your butter before mixing it with the sugar to add a nutty, caramelized depth to your blondies. If you’re looking to add some crunch, throw in a handful of chopped nuts alongside the chocolate chips. To keep your blondies moist, store them in an airtight container; they’ll stay fresh for days. And if you’re planning ahead, these blondies freeze beautifully—just wrap them well and they’ll be just as delicious when you thaw them out for your next craving.
Nutrition Facts
- Serving size: 1 square
- Calories: 280
- Fat: 12g
- Carbs: 38g
- Protein: 3g
- Sodium: 200mg
- Fiber: 1g
Please note: Nutritional values are estimates and can vary based on brand and exact measurements.
Prep Time
- Prep time: 10 minutes
- Cook time: 25 minutes
- Total time: 35 minutes
Please note: Times are estimates and may vary depending on oven efficiency and altitude.
Frequently Asked Questions (FAQs)
What’s the difference between brownies and blondies?
Brownies and blondies are like siblings in the dessert world! Brownies are known for their deep chocolate flavor, thanks to the cocoa or melted chocolate. Blondies, on the other hand, swap out cocoa for vanilla and brown sugar, giving them a rich, butterscotch-like taste. Both are equally delicious and perfect for baking at home. So, next time you bake, why not try both?
What are the three types of brownies?
There are three main types of brownies that you can bake: fudgy, cakey, and chewy. Fudgy brownies are super moist and dense, with lots of chocolate and butter. Cakey brownies have more flour and a bit of baking powder to give them a lighter, cake-like texture. Chewy brownies strike a balance, with a bit of both worlds—chocolatey but with a firmer bite. Each type offers a unique taste experience!
Why are my brownies flat?
If your brownies are coming out flat, there are a few possible reasons. First, check if your baking soda or powder is fresh; they lose effectiveness over time. Also, make sure you’re not overmixing the batter after adding flour, as this can deflate the air bubbles that help brownies rise. Lastly, ensure your oven is properly preheated—baking at the right temperature is key for that perfect rise!
How to keep brownies soft and chewy?
Keeping your brownies soft and chewy is all about moisture control. First, don’t overbake them; remove them from the oven when the center is just set but still soft. Next, store them in an airtight container to lock in moisture. If they start to dry out, you can add a slice of bread to the container—the brownies will absorb moisture from the bread, staying soft and chewy for days. Enjoy your perfect batch of brownies!
Print
Classic Lunch Lady Brownies
- Total Time: 35 min
- Yield: 1 9×13-inch pan of brownies
Description
These Classic Lunch Lady Brownies are the rich, fudgy, and nostalgic treats that instantly take you back to school cafeteria days. With a dense, chocolatey base and a smooth, glossy chocolate frosting, these brownies are the ultimate comfort dessert. Simple ingredients, easy steps, and a guaranteed crowd-pleaser—this recipe will bring back childhood memories with every bite!
Ingredients
For the Brownies:
- 1 cup (2 sticks) unsalted butter, melted
- ½ cup unsweetened cocoa powder
- 2 cups granulated sugar
- 4 large eggs
- 1 tablespoon pure vanilla extract
- 1 ½ cups all-purpose flour
- ½ teaspoon salt
For the Frosting:
- ¼ cup unsalted butter, softened
- ¼ cup unsweetened cocoa powder
- ¼ cup whole milk (or more, as needed)
- 2 cups powdered sugar
- 1 teaspoon pure vanilla extract
Instructions
Make the Brownies:
-
Preheat & Prep: Preheat your oven to 350°F (175°C). Grease or line a 9×13-inch baking pan with parchment paper.
-
Mix the Wet Ingredients: In a large bowl, whisk together melted butter and cocoa powder until smooth. Stir in the sugar, eggs, and vanilla extract until fully combined.
-
Add Dry Ingredients: Gently fold in the flour and salt just until mixed—avoid overmixing to keep the brownies fudgy.
-
Bake: Pour the batter into the prepared pan and spread it evenly. Bake for 25-30 minutes, or until a toothpick inserted in the center comes out with a few moist crumbs.
Make the Frosting:
-
Mix the Frosting: While the brownies are still warm, prepare the frosting. In a medium bowl, whisk together butter, cocoa powder, milk, powdered sugar, and vanilla extract until smooth and creamy. If needed, add a little more milk to reach a spreadable consistency.
-
Frost the Brownies: Spread the frosting over the warm brownies so it melts slightly into the top.
-
Cool & Serve: Allow the brownies to cool completely before slicing into squares. Enjoy!
Notes
- Make It Extra Fudgy: For an even richer texture, add ½ cup of melted chocolate chips to the batter.
- Storage: Store in an airtight container at room temperature for 3-4 days, or refrigerate for up to a week.
- Freezing Tip: Wrap individual brownies in plastic wrap and freeze for up to 3 months.
- Nut-Free & Allergy-Friendly: These brownies are naturally nut-free, making them perfect for school-safe treats.
- Serving Suggestion: Enjoy with a scoop of vanilla ice cream or a drizzle of caramel sauce for extra indulgence.
- Prep Time: 10 min
- Category: Desserts
- Cuisine: American
Nutrition
- Serving Size: 12-16 squares
- Calories: 320
- Sugar: 34g
- Sodium: 90mg
- Fat: 15g
- Carbohydrates: 45g
- Protein: 3g